Showing posts with label tutorial. Show all posts

Wednesday, April 2, 2014

Homemade Breakfast Sandwiches

Mr. J is a hungry guy!  He works hard at work and needs a good breakfast to get him started in the morning.  He loves breakfast sandwiches but they can be expensive!!  So I thought I would try my hand at making my own.  I found this recipe and it looked easy enough so I went for it!


I started off with these English muffins.  They were 2 for $5 (so 12 total) at my local grocery so I thought that was a good deal! 


I lightly toasted them up and then set them up to cool. It was like building a house of cards but with English muffins.


Next I cracked an egg into each cup of a muffin tin and baked them at 350 for about 15-20 min.  The original recipe said 10-15 but when I checked on them they looked pretty runny!  So I cooked them a little longer!  Mr. J said that if I did these again I should whip the yokes into the whites.  He said the yokes tend to stay colder than the rest of the sandwich when he reheats them.  So if you try this make sure to stir up the eggs!


I then put the bottoms of the muffins on a foil lined cookie sheet (the foil just helps with an easier clean up!) and then I put a slice of cheese on top!  MMM bread and cheese, so far so good!


Then I put the cooked and cooled eggs on top of the cheese. 


Now it's time to put the tops on the muffins.  Those look so delicious!


There is a side view for you!  They stick up but we will fix that! I squished them down a bit when I wrapped them with plastic wrap. 
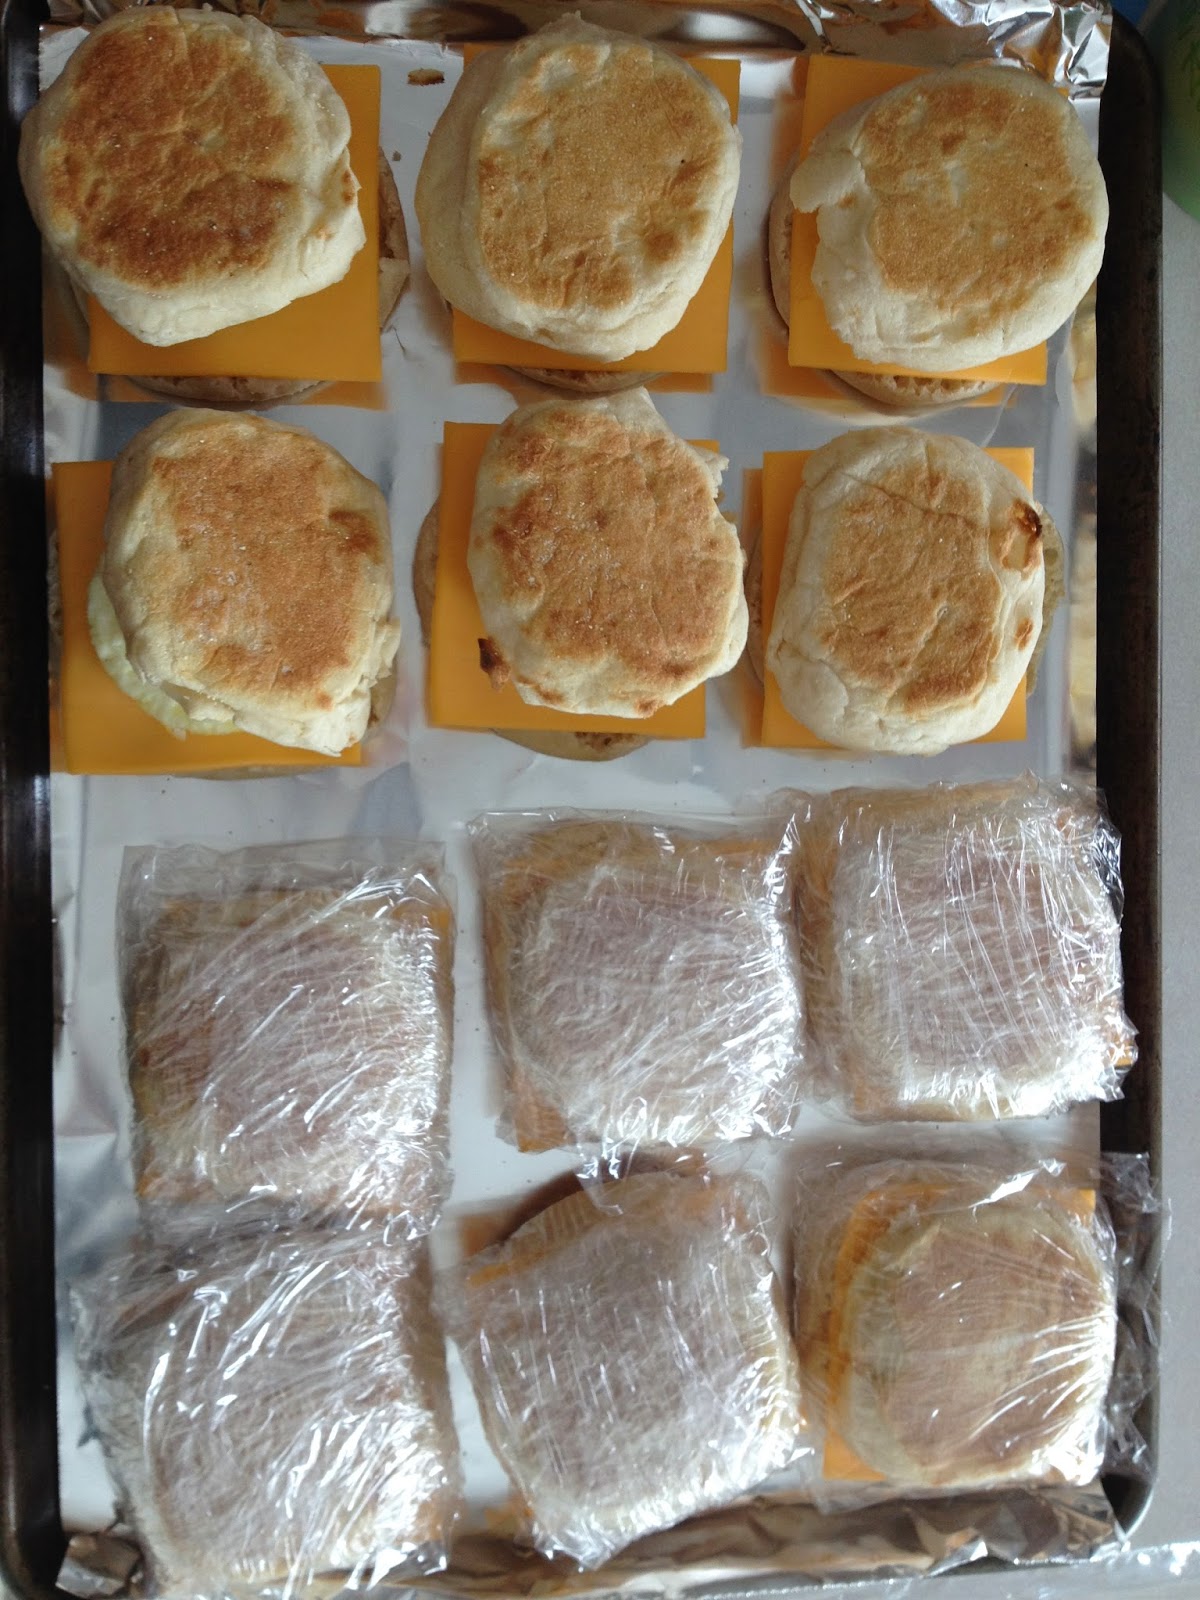

I wanted to par-freeze (is that a word?) them a bit before I wrapped them.  So I put them on top of our chest freezer in the garage (cause it's about 20 degrees out there) but you could stick them in your freezer if you have room.  And once they were semi frozen I wrapped them in plastic wrap and put them in the freezer.  Now Mr. J defrosts one in the microwave and then heats it up. The original recipe said to cook in the oven for 25-30 min but I do NOT have time in the morning to fire up the oven and cook something before Mr. J leaves.  So the microwave works just fine for us.  Now I can send Mr. J to work happy and well fed for about $0.80 a sandwich!  And start to finish this took me about an  hr (not including the hr in the freezer!).

What does your hubby/wife eat before work?  Do you make them something or do they get something on the run?

Love, Lacey

Friday, March 14, 2014

Buying Cheese in Bulk


I wanted to share with you a little money saving tip!  We are a family of 5 with only one income.  So we have a pretty tight grocery budget.  I meal plan and do the best that I can with what I have. I thought I would share one of my favorite money saving tips in hopes it will help someone else!

We go through a lot of shredded cheese!  I make Mac'n'cheese almost every week and we have tacos and chili often and all those mean the need for shredded cheese.  So I buy this big bag of shredded Colby Jack from Sam's Club for about $14.  


I put the big plastic bag in this metal bowl to help keep it upright.  I cut the whole top off the bag since I'm going to separate the bag out into smaller bags so no need for the resealable top!  I pre-open about 10 Ziploc quart size freezer bags and put about 2 cups of cheese in each bag.  Most of the bags of shredded cheese you buy in the store are 2 cups so that is what I do.  But you could easily do 1 cup or 4 cups or anything that you wanted!


After I scoop them all out I squeeze out most of the air, seal the top, and fold the bag over.  I get about 12, 2 cup bags out of that 5 lbs bag of cheese.  If you do the math that averages out to about $1.17 a bag!  The last time I looked a 2 cup baggie of shredded cheese at the grocery store was well over $2 and closer to 3 or 4!  


Any time I need to make something or we are getting low on cheese in the fridge, I just go out to our chest freezer and pull a bag out!  I usually have to buy more cheese within 2-3 months and the cheese is just as good the last bag as it is the first!  If you are looking for a way to save some money at the grocery store try buying shredded cheese in bulk! I have found it's a great way to save some money!  Hope you try it out!!

What is your best money saving tip? What over tips would you like?!

Love, Lacey


Thursday, December 5, 2013

DIY Candle Sticks

Happy Thursday!  I have been busy putting up Christmas decorations like everyone else across the world! And like most Americans I have WAY too many decorations and a lot of them I don't use.  I wanted to do something different with my mantle this year but didn't want to spend a bunch of money so I started to look at my usual decorations.  I found these candle holders.  I bought these about 4 years ago the day after Christmas for $5 at Walmart!  The red is pretty and for the last few years they have been fine.  But I wanted something different so DIY make over here we go!

Plain candle holders

First I took the candle holders out of the box and washed them up.  They were disgustingly dusty dirty as I'm sure I didn't clean them before I put them away last year!


Painter's Tape
I then put some painter's tape on the base.  I wanted the red part painted but I wanted the clear stem to stay clear.  Looking back I should have taped some newspaper around the stem to make SURE no over spray got on the stem (like it MIGHT have!) 


Microfiber cloth
Next I wiped them all down with a microfiber cloth to make sure I got all the dust and lint off.  If you leave lint or dust on the surface the paint won't adhere and will flake later or go on patchy.


GOOOOOOOLLLLDDD!
Next I put on two coats of this Krylon paint.  I chose a nice gold color to match my decor idea.  You could honestly use ANY color you wanted.  This said it was metallic but it didn't turn out quite as shiny as I was hoping.  It still is a nice gold color but not shiny. 

Finished product!
There is the finished product!  I am really excited how these came out.  I haven't put everything on the mantle that I wanted but I did at least set these up there to see how they looked.  Please excuse those blue screws.  I'm not even sure where those came from?!?  


ANYWAYS!!  There is my super easy Christmas DIY redo! Hope you will take a look around and find something to redo or re-purpose.  

Love, Lacey


Monday, November 25, 2013

How to remove difficult nail polish

Happy Monday! Today seems like a Makeup Monday! So I'm going to show you how to remove stubborn nail polish! We have all had it, that glittery nail polish that just won't come off.  Or that DARK red or purple or black that seems to stain your nails.  Here is a quick tutorial on how I remove my nail polish (glittery or not).

So here are my nails! This is the new Sally Hansen Fuzzy Coat polish in the color All Yarned up. If you don't know what this polish is, it is basically like a chunky glitter/confetti/sprinkle type polish.  It's a cute polish but its not easy to get off!


First, I take a cotton ball and unwrap it. It should unwrap into a long continuous piece of cotton.  I tear the long piece into about 5 or 6 chunks per cotton ball.  Then I pour some of my nail polish remover into the cap of the bottle. Be very careful not to spill.  I usually do this on a table or at our kitchen counter.  I use 100% pure acetone remover.  I know it's not the healthiest for your nails but my nails are strong and it works great for me!


Then take one of those cotton pieces and dip it into the remover.  Be careful not to soak up too much remover as you don't want it to drip everywhere. Then simply lay it on your nail.  Make sure the wettest part of the cotton piece is touching the nail itself.  That is what will allow it to soak the polish or glitter off. 


I usually leave the cotton on my nails for between 1 and 3 minutes.  It just depends on what polish is on my nails.  If it's glitter (or something like this fuzzy polish) I leave it on 3 minutes.  If it's just a regular polish, 1-2 minutes will be fine.  Once your time is up simply use the cotton that is on each nail and wipe them off.  If you have some still left around the edges take another cotton ball soaked with remover and simply wipe them down it should come off pretty easily. 


And there are my nails all clean!  It all came off pretty easily considering that it was a lot of glittery type pieces on my nails.  And you can see the crazy blue color that I painted them next! I hope you try this method of taking off polish the next time you are ready to change your polish. Hope you have a happy Monday!

Love, Lacey!