Showing posts with label DIY. Show all posts

Monday, April 14, 2014

I Love Salad


I have the absolute BEST husband in the world!  Mr. J and I have gotten into gardening the last couple of years.  We currently have 3 garden boxes in our yard and last year grew lots of yummy veggies.  Last summer I'm pretty sure I made stir fry out of our garden every day!  So amazing!  We are planning on adding another garden box for this year to grow even more veggies but I did mention to Mr. J that I didn't like harvesting lettuce out of the boxes.  We have to put chicken wire around the sides of the boxes because we have so many bunnies and squirrels that would love to eat MY garden! The chicken wire fence comes up a couple feet so it's hard for me to bend over it and cut the lettuce.  So my AMAZING hubby said he would build me a salad table!  Yesterday he worked hard in the garage to build it for me.  We put it on the deck right outside the back door and I couldn't be more excited for summer! I told him we will be eating salad at every meal and my juice/smoothies will be fueled by fresh spinach from the garden! 

I'll keep you updated and take more pictures once we plant it and it starts growing!  Bring on the summer!

Do you garden?  What is your favorite thing from the garden?

Love, Lacey

Wednesday, April 2, 2014

Homemade Breakfast Sandwiches

Mr. J is a hungry guy!  He works hard at work and needs a good breakfast to get him started in the morning.  He loves breakfast sandwiches but they can be expensive!!  So I thought I would try my hand at making my own.  I found this recipe and it looked easy enough so I went for it!


I started off with these English muffins.  They were 2 for $5 (so 12 total) at my local grocery so I thought that was a good deal! 


I lightly toasted them up and then set them up to cool. It was like building a house of cards but with English muffins.


Next I cracked an egg into each cup of a muffin tin and baked them at 350 for about 15-20 min.  The original recipe said 10-15 but when I checked on them they looked pretty runny!  So I cooked them a little longer!  Mr. J said that if I did these again I should whip the yokes into the whites.  He said the yokes tend to stay colder than the rest of the sandwich when he reheats them.  So if you try this make sure to stir up the eggs!


I then put the bottoms of the muffins on a foil lined cookie sheet (the foil just helps with an easier clean up!) and then I put a slice of cheese on top!  MMM bread and cheese, so far so good!


Then I put the cooked and cooled eggs on top of the cheese. 


Now it's time to put the tops on the muffins.  Those look so delicious!


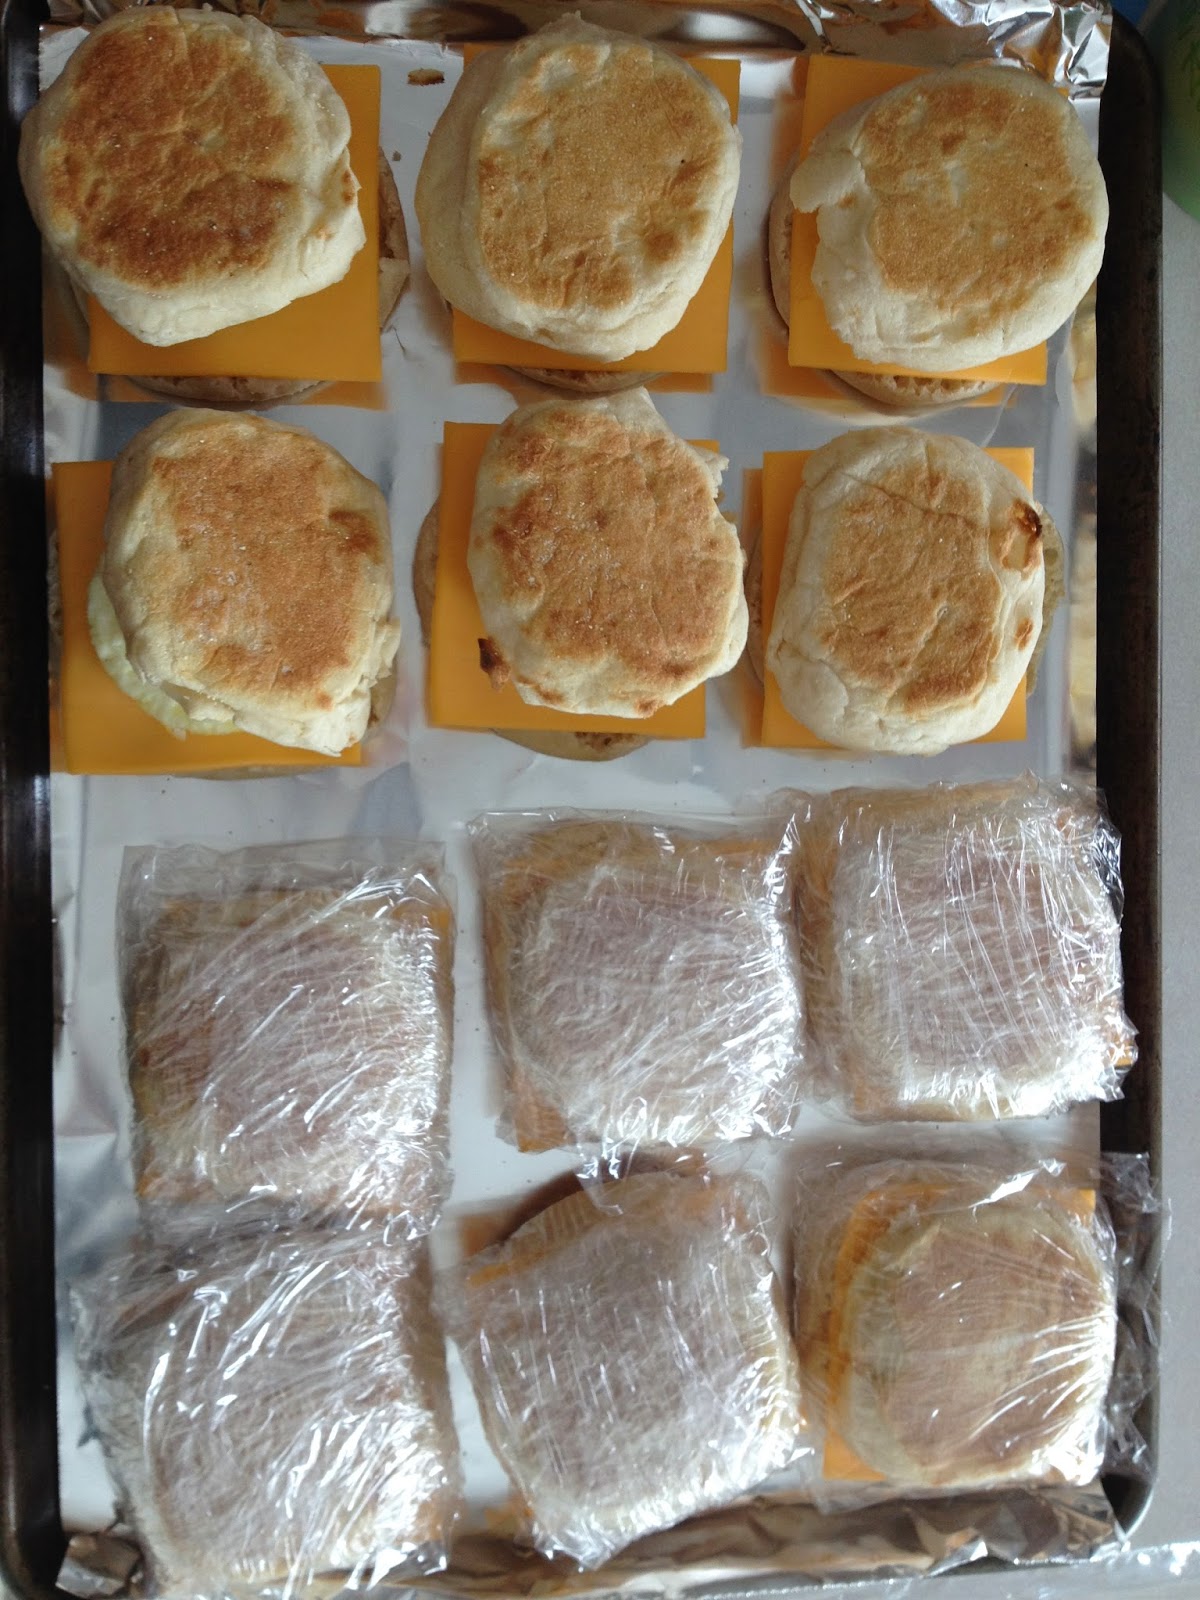
There is a side view for you!  They stick up but we will fix that! I squished them down a bit when I wrapped them with plastic wrap. 


I wanted to par-freeze (is that a word?) them a bit before I wrapped them.  So I put them on top of our chest freezer in the garage (cause it's about 20 degrees out there) but you could stick them in your freezer if you have room.  And once they were semi frozen I wrapped them in plastic wrap and put them in the freezer.  Now Mr. J defrosts one in the microwave and then heats it up. The original recipe said to cook in the oven for 25-30 min but I do NOT have time in the morning to fire up the oven and cook something before Mr. J leaves.  So the microwave works just fine for us.  Now I can send Mr. J to work happy and well fed for about $0.80 a sandwich!  And start to finish this took me about an  hr (not including the hr in the freezer!).

What does your hubby/wife eat before work?  Do you make them something or do they get something on the run?

Love, Lacey

Tuesday, December 10, 2013

Holiday Fun with The Calamity Janes


My Breakfast

What an awesome day! A couple of my besties and I (also known as The Calamity Janes) decided we would get together and do teacher gifts as a group.  It helps that one of us is crafty, one of us is an amazing baker, and I was just there for entertainment I'm pretty sure.  So I started my day with this delicious (and filling) breakfast!  If you buy the Naked juice just make sure you watch the calories.  That big bottle had around 600 calories!!  Not bad if you break it up, but if you are downing it all at once you may go over your daily caloric intake pretty quickly.

2 of my besties

Hey look at those gorgeous girls!  L's husband was kind enough to take this picture for us.  Notice J's awesome Christmas sweater?  Wish I would have gotten the memo I have a pretty sweet Christmas sweater myself.  But I did bring my Christmas apron! And J's Christmas apron was actually her grandmothers! I LOVE these girls!

Chalkboard cookie sheets
This was where J really shined!  She is an awesome crafty person, so she came up with this part of the gift.  That's a cookie sheet that she painted with chalkboard paint.  Then decorated with some stickers (that she hot glued on) and a letter for the teacher's name. She also added a little bow at the top at the end.  I told you she is awesome.  These are so cute & a great gift for anyone!  I can see giving these to family or friends. I would use one in our house!  It would make a great prayer request board or scripture memorization or even your grocery list!

Time to get baking!

Here is where L shines!   She came up with so many cookie and bar recipes that my head was spinning!  I tried to help as much as I could but I mostly just burnt the chex mix. Speaking of chex mix, I decided this is the best gf snack.  It's salty & buttery and I can burn it like anything I cook but it tasted SO good!  But L had so many cookies premade or the dough ready for us!  Just amazed at her creativity!

Time to put it together

This is L's dinning room table.  It was full up with goodies!  We made bags of cookies, bark & chex mix! It all looked SO good!

That is a FULL table

And when I say FULL I mean FULL!  This is not a small table!  And we filled it! This side is the bags that we made for the kids' Sunday school teachers!  Those monster cookies almost didn't make it into the bags.  I wanted to smash a couple and run! But it felt so good to make all this up knowing we would make someone (or their family) very happy!

Finished Product!

And there is the finished product!  These are definitely not "bus safe" so I will be hand delivering these to the schools.  There is also a bird seed ornament that goes on top.  It's really adorable!  I'm sure the birds will be flocking to our teacher's houses to get their little beaks on these yummy treats.

All in all it was such a fun day! Not only did a great gift get done but I got to spend some time with my besties!  I love these girls.  I have never had friends that I knew would love me no matter what. The six pack is the kind of group that we may be closer to a certain person at different times in our lives but as a group we love each other and have each others backs no matter what.   I love these girls like sisters and can't imagine myself without them!  Thank you for all the love & support.  And Calamity Janes?! Thanks for making me look good to the teachers!

Love, Lacey


Thursday, December 5, 2013

DIY Candle Sticks

Happy Thursday!  I have been busy putting up Christmas decorations like everyone else across the world! And like most Americans I have WAY too many decorations and a lot of them I don't use.  I wanted to do something different with my mantle this year but didn't want to spend a bunch of money so I started to look at my usual decorations.  I found these candle holders.  I bought these about 4 years ago the day after Christmas for $5 at Walmart!  The red is pretty and for the last few years they have been fine.  But I wanted something different so DIY make over here we go!

Plain candle holders

First I took the candle holders out of the box and washed them up.  They were disgustingly dusty dirty as I'm sure I didn't clean them before I put them away last year!


Painter's Tape
I then put some painter's tape on the base.  I wanted the red part painted but I wanted the clear stem to stay clear.  Looking back I should have taped some newspaper around the stem to make SURE no over spray got on the stem (like it MIGHT have!) 


Microfiber cloth
Next I wiped them all down with a microfiber cloth to make sure I got all the dust and lint off.  If you leave lint or dust on the surface the paint won't adhere and will flake later or go on patchy.


GOOOOOOOLLLLDDD!
Next I put on two coats of this Krylon paint.  I chose a nice gold color to match my decor idea.  You could honestly use ANY color you wanted.  This said it was metallic but it didn't turn out quite as shiny as I was hoping.  It still is a nice gold color but not shiny. 

Finished product!
There is the finished product!  I am really excited how these came out.  I haven't put everything on the mantle that I wanted but I did at least set these up there to see how they looked.  Please excuse those blue screws.  I'm not even sure where those came from?!?  


ANYWAYS!!  There is my super easy Christmas DIY redo! Hope you will take a look around and find something to redo or re-purpose.  

Love, Lacey